For thousands of years the Long Bow was considered the pinnacle of modern warfare. From Ancient Native American Hunters to every day weekend archery warriors, the long bow has with stood the test of time. It is considered the oldest hunting and fighting tool on earth. Learning to construct your very own long bow can be considered a rite of passage and an excellent survival skill for anyone looking to further their wilderness skill set.
We'd like to take a short moment to thank wikihow for these awesome illustrations.
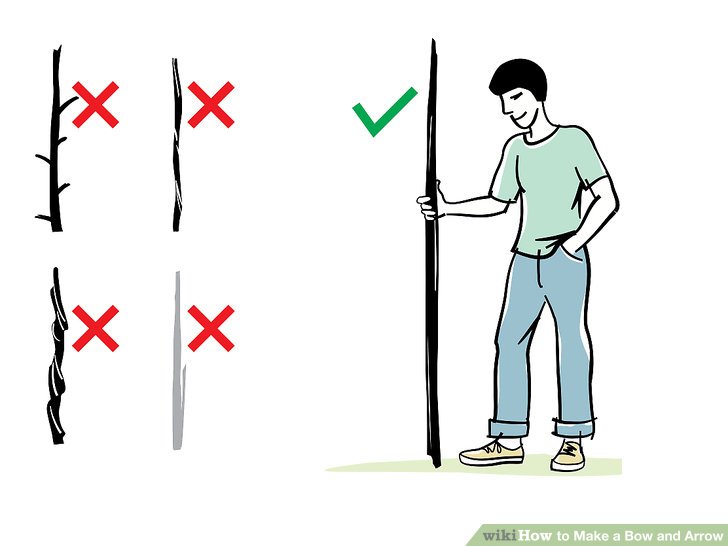
Make sure the wood is just right
Like any new project, picking a solid foundation is always important. The first thing you want to do is find a piece of dry and dead wood about 6 feet tall or as tall as you may be. The wood should not have any knots, twists or limbs, and it would be helpful if the branch is thick at the center. This piece of wood should be somewhat flexible, You can use bamboo or cane as long as it is not too thick.
Find the Curve
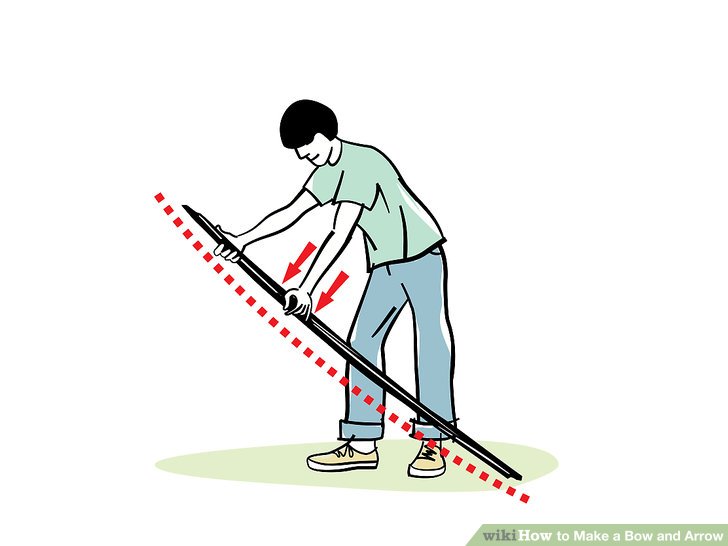
Even the straightest piece of wood has a natural curve to it. To find the curve, place your wood on the ground with one hand holding it in place at the top. With your other hand, press against the middle. This will cause it to will turn so that its natural belly faces you, and its back faces out.
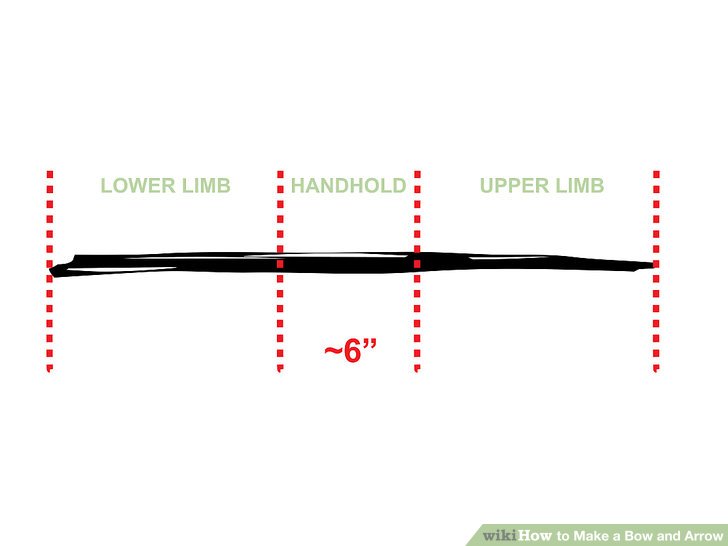
Hand Placement
Determining where to place your hands on the bow is very important; it can determine whether your bow will shoot straight or not. To find the handhold, make marks three inches above and below the center of the bow. Anything within these marks is the handhold. Above them is the upper limb, and below is the lower limb.
Find the perfect shape
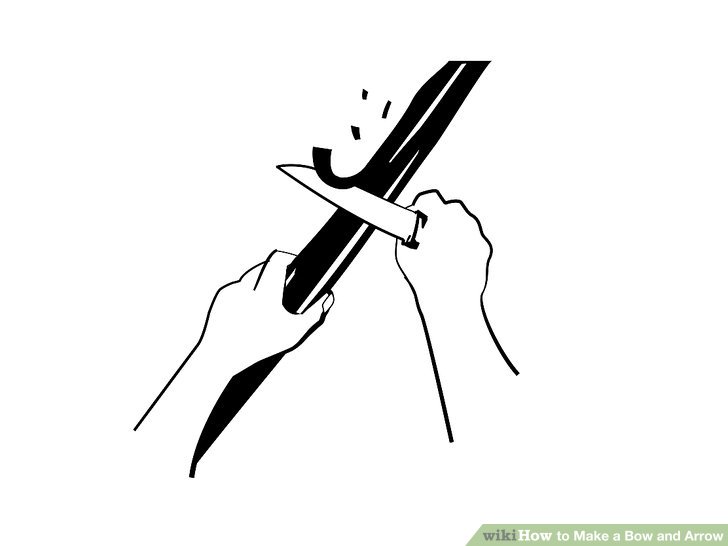
Place the bottom end of the bow on your foot and one hand atop the bow. With your other hand, push outward with the belly facing you. This will determine where your bow is flexible and where it is not. With a sharp knife, shave wood off the unwanted wood on the belly, until both the upper and lower limbs curve similarly to each other. When both limbs are more flexible and are close mirror images of each other in curve, you are ready for the next step.
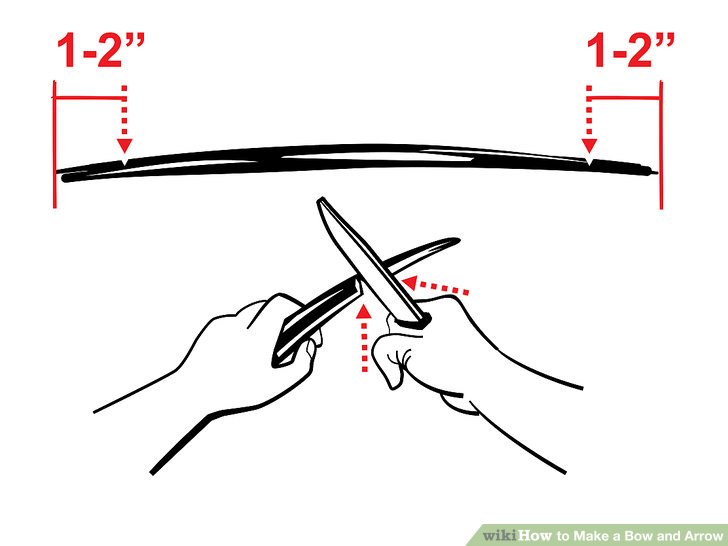
Notch your Bow
Use your knife to cut notches that begin at the sides and curve around toward the belly of the bow and in toward the handhold as they go. There should be one on each side 1 to 2 inches from each end of the bow. It is very important to try and rembemer not to cut into the back of the bow, and do not make the notches deep enough to weaken the strength of the tips. Make them just deep enough to hold the string in place.
Stringing up the Bow
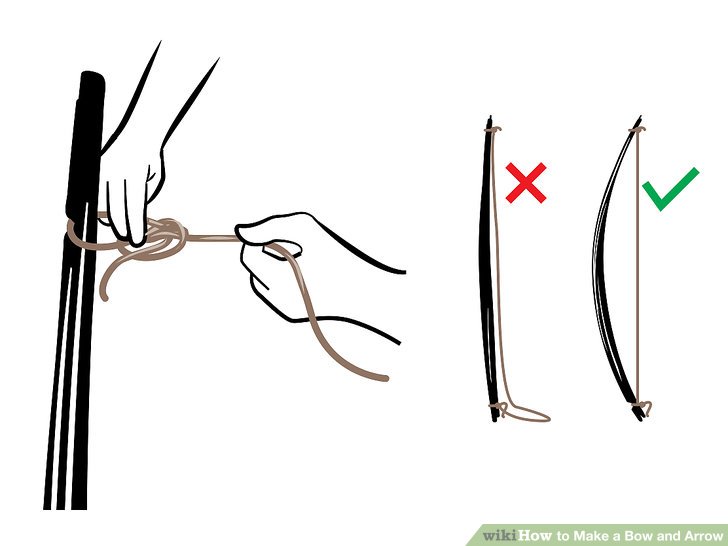
When selecting your bow string it is important to remember that the power comes from the bow itself. However, the string should not be stretchy. There are plenty of alternatives that can be used when selecting the right string such as. Raw Hide, thin Nylon rope, Hemp cord, and Fishing line just to name a few. Make a loose loop with a tight knot on both ends of the string before slipping it over the ends of your bow. Be sure that your bowstring is slightly shorter than the length of your bow to assure that your bow and string and both tight.
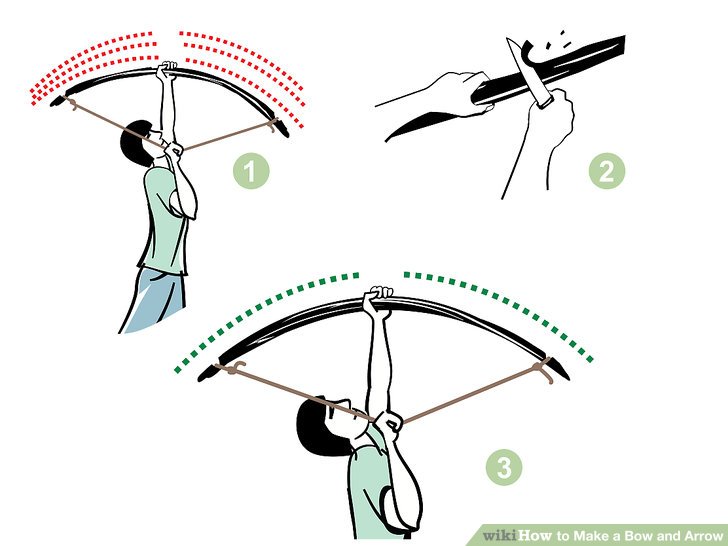
Tiller Your Bow
According to Stickbow.com “Tiller is the difference between the upper limb and lower limb measurements from the bowstring to the belly at the fade outs. Bows are traditionally tillered to produce a stiffer lower limb; ie, the bowstring to belly measurement on the lower limb is less than the same measurement on the upper limb.”
Once we begin the tillering process we want to hang our bow from a tree limb or something similar that will allow you to pull downward on the string slowly. While making sure the ends of your bow bend evenly and carving wood away when necessary. Once you can pull down all the way to where your hand reaches your jaw with your arm extended at the shoulder, your bow is ready.
Once you have completed your bow, now is the time to make it your own. Making your own bow from scratch is great experience for youth. It can help develop most (if not all) the life skills that Youth Odyssey strives to teach. Creating a long bow especially focuses on problem solving and critical thinking. It also gives the youth a sense of responsibility. After all, it is your bow and operating one requires a lot of responsibility. So go out, have fun and always be safe.